

-

Right Lane Exits – 2 Right Lanes Exit, Next Lane Exit or Through (Freeway)
Wa-53R | Right Lane Exits – 2 Right Lanes Exit, Next Lane Exit or Through (Freeway)
This product has multiple variants. The options may be chosen on the product page -

Left Lane Exits – 3 Must Exit (Freeway)
Wa-54L | Left Lane Exits – 3 Must Exit (Freeway)
This product has multiple variants. The options may be chosen on the product page -

Right Lane Exits – 3 Must Exit (Freeway)
Wa-54R | Right Lane Exits – 3 Must Exit (Freeway)
This product has multiple variants. The options may be chosen on the product page -
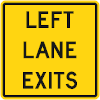
Left Lane Exits (Non-Freeway)
Wa-56L | Left Lane Exits (Non-Freeway)
This product has multiple variants. The options may be chosen on the product page -
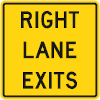
Rigth Lane Exits (Non-Freeway)
Wa-56R | Rigth Lane Exits (Non-Freeway)
This product has multiple variants. The options may be chosen on the product page -

Two Left Lanes Exit (Non-Freeway)
Wa-57L | Two Left Lanes Exit (Non-Freeway)
This product has multiple variants. The options may be chosen on the product page -
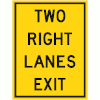
Two Right Lanes Exit (Non-Freeway)
Wa-57R | Two Right Lanes Exit (Non-Freeway)
This product has multiple variants. The options may be chosen on the product page -
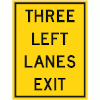
Three Left Lanes Exit (Non-Freeway)
Wa-58L | Three Left Lanes Exit (Non-Freeway)
This product has multiple variants. The options may be chosen on the product page -
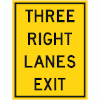
Three Right Lanes Exit (Non-Freeway)
Wa-58R | Three Right Lanes Exit (Non-Freeway)
This product has multiple variants. The options may be chosen on the product page -
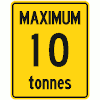
Maximum Tonnes Advisory – Single Gross Weight
Wa-63 | Maximum Tonnes Advisory – Single Gross Weight
This product has multiple variants. The options may be chosen on the product page -
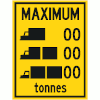
Maximum Tonnes Advisory – Multiple Gross Weight By Truck Type
Wa-63A | Maximum Tonnes Advisory – Multiple Gross Weight By Truck Type
This product has multiple variants. The options may be chosen on the product page -

Divided Road Intersection Ahead
Wa-72 | Divided Road Intersection Ahead
This product has multiple variants. The options may be chosen on the product page -

Speed Hump
Wa-74 | Speed Hump
This product has multiple variants. The options may be chosen on the product page -
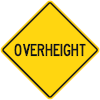
Overheight (With Amber Flashers)
Wa-76 | Overheight (With Amber Flashers)
This product has multiple variants. The options may be chosen on the product page -

When Flashing Tab
Wa-76t | When Flashing Tab
This product has multiple variants. The options may be chosen on the product page -

Bump Tab
Wa-22t | Bump Tab
This product has multiple variants. The options may be chosen on the product page -

Stop Ahead
Wb-1 | Stop Ahead
This product has multiple variants. The options may be chosen on the product page -

Yield Ahead
Wb-1A | Yield Ahead
This product has multiple variants. The options may be chosen on the product page -

Traffic Signals Ahead
Wb-2 | Traffic Signals Ahead
This product has multiple variants. The options may be chosen on the product page -

Traffic Signals Ahead (With Amber Flashers)
Wb-2A | Traffic Signals Ahead (With Amber Flashers)
This product has multiple variants. The options may be chosen on the product page -

Prepare To Stop When Flashing Tab
Wb-2At | Prepare To Stop When Flashing Tab
This product has multiple variants. The options may be chosen on the product page -

New Sign (For Stop, Yield and Signal)
Wb-3 | New Sign (For Stop, Yield and Signal)
This product has multiple variants. The options may be chosen on the product page -

Two-Way Traffic Ahead
Wb-4 | Two-Way Traffic Ahead
This product has multiple variants. The options may be chosen on the product page -

Keep Right
Wb-6 | Keep Right
This product has multiple variants. The options may be chosen on the product page -
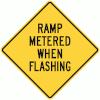
Ramp Metered When Flashing
Wb-7 | Ramp Metered When Flashing (With Ambeer Flashers)
This product has multiple variants. The options may be chosen on the product page